 As you may know, as convenient as blenders are, the blades get duller over time with regular use.
So it is useful to know how to sharpen ninja blender blades instead of getting yourself a new blender.
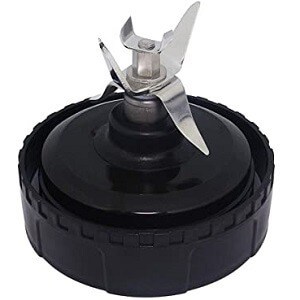
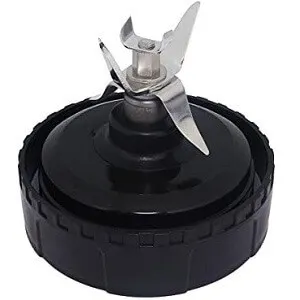
They have four primary blades. Two blades are pointing down, and two blades are pointing up. The only blades that can be sharpened are the ones pointing upward.
With blenders, you can make anything, from crushing the ice cubes for your cold coffee to making a smooth puree of tomatoes.
If you have a blender that stands the taste of time but is no longer pureeing or chopping at its best, do not toss it. Consider the alternative that pays off more.
With this little info, you will acquire all the knowledge you need in order to sharpen your blades instead of replacing a beloved functional blender.
The blades on your blender are made of metal and can be easily sharpened using the right approach and tools I’ll mention below.
Read More: What is the best Ninja blender?
How To Sharpen Ninja Blender Blades
First and foremost, check your socket to ensure your blender is unplugged and free of the danger of electrocuting you.
Also, it keeps you from harm if you were to accidentally turn the blender on while you’re at it.
Step 1 – Remove The Blender Jug
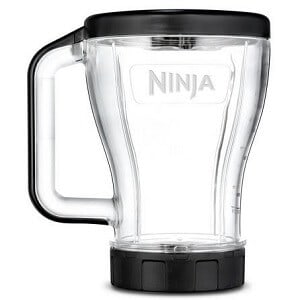
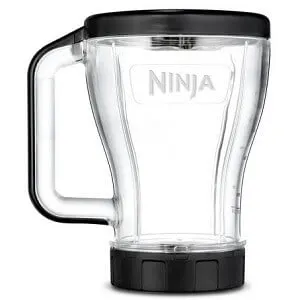 Most importantly, you have to set aside the blender jug. Pull the blender apart and separate the base from the glass or plastic pitcher on top.
You can opt for washing the plastic container in case you intend to blend a smoothie as soon as you’re done with sharpening the blades.
You can clean it a second time after the sharpening process is done. While you do this, don’t neglect the rest of the blender that requires cleaning as well.
A brush or cloth will do the job or mild dishwasher.
Step 2 – Remove The Blade
Now that you’ve done all of that, you need to remove the blade. At the bottom of the blender, you will see the jug contains the base that holds the blades to the jug.
All you really need to do is twist it counter-clockwise in order to divide it. If you’ve done everything the right way it will come off in your hands with no need for further force.
The next step is placing the pitcher on the counter. Bear in mind, if it’s made of glass do not leave it by accident close to the edge of the countertop. It can be shattered that way.
After you’ve done this, you should be holding a ring or seal, and the base with the blades attached firmly to it.
Anyway, now comes the time to separate all these parts from the base. Put everything down next to the jar for safekeeping, the blades alone should remain.
Read More: How to remove a Vitamix blade
Step 3 – Wash The Blade

 Your blades could now use another rinse in the warm soapy water. If there are any food bits that have gone hard or particles on the blade you can successfully remove it using a brush.
It is worth noting that, you should not drop it into the sink. Soap can make it very hard for you to see the blades through the water, which leads to you resorting to cleaning it blindly.
Keep in mind, even if your blade is dull if you grab it the wrong way it will cut you. Accidents such as this are best avoided.
Another thing, if you are handling the blades directly you should always wear a pair of rubber gloves. It at least provides some protection for your skin.
Be sure to wash the blades thoroughly, be on the lookout for any leftover food particles. Remove them with a scouring pad.
A sponge can be highly effective for removing metal fragments.
Read More: Can Ninja Blenders Go in the Dishwasher – Best Cleaning Practices
Step 4 – Sharpen The Blade
Begin running one of the blade edges on a sharpening stone or tool, keeping with and preserving the angle that the blade is already shaped to.
When you do this, always run the blade in the direction opposite of your body to prevent the risk of accidental injury.
Once you’ve worked enough on one edge, turn it over, and continue to sharpen the other side in the same way.
Each blade possesses four sides, two backs, and two fronts. Repeat the sharpening process until you are satisfied with the results.
Related Articles:
Step 5 – Reassemble The Blender
Arriving at this step means that most of the work is behind you. All that’s left for you to do is wipe the blade clean once more with a wet rag. And then, dry it with your towel.
Next, put the blade in the base and add the wax ring or the seal. Pick up the blender pitcher, and screw the base back on.
You’ve made it. Just reattach this entire piece to the electronic base and plug it in to test the sharpened blades.
How To Sharpen Ninja Blender Blades: Final Thoughts
All in all, with frequent use your blades will get duller and duller. That is precisely why you will need to put aside some time to sharpen the blades.
To implement a way easier, the money-saving method that just needs you to acquire a little bit of knowledge on how to do it.
Ninja blenders are a great kitchen appliance that provides you with various food options.
With them, you can chop, puree, blend and what not. It only makes sense that the more you use them, the duller the blades get. But, that does not mean that all hope is lost.
You just have to occasionally sharpen the blades to keep your blender fresh.
It would be a shame to throw away the still functioning blender just because it doesn’t work like it used to.
Especially, when all you need to do in order to fix that is to know how to sharpen the blender blades. Namely, ninja blender blades.
Once you understand how to sharpen ninja blender blades, in a few easy steps your blender is as good as new.