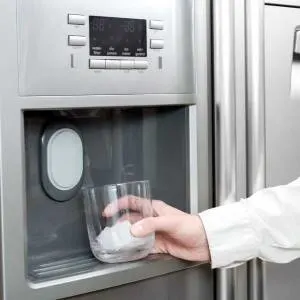
 An ice maker is one of those appliances that can often get overlooked when cleaning. If you are wondering how to clean an ice maker, this post has got you covered.
Keeping your appliances clean and maintained is important to ensure they work properly. If you have an ice maker, it’s just as necessary that this appliance stays looking like new.
In this article, I’ll take a closer look at how best practices can help keep everything running smoothly in order for all of those cubes to taste better than ever before.
So, what are you waiting for? Brush up on how easy it is to clean an ice maker and then get started today.
How to Clean an Ice Maker: Important Points
There are a few key points to remember when cleaning your ice maker:
- Unplug the machine before beginning any kind of cleaning process.
- Never use harsh chemicals or abrasives on or around your ice maker as this can cause damage.
- Wipe down all surfaces with a mild detergent and water mixture.
- Rinse off all surfaces with clean water and allow to air dry.
- If there is any build-up in the machine, use a vinegar and water mixture to clean it away (50/50 mix).
These are the basic steps to cleaning your ice maker. Let’s take a look at some of the areas you’ll want to pay most attention to in order for everything to run like new again.
How To Clean An Ice Maker: The Dispenser
The dispenser is one of the most important parts of an ice maker that requires regular cleaning, especially if it comes into contact with hands after touching other surfaces (kitchen counters, tabletops, etc).
Any dirt or bacteria on your fingers could end up in this area once they’re dispensed as cubes by the machine. In order to avoid any contamination from these various sources, you’ll want to wipe down this section often with a soft cloth and warm water mixture. You can also try using a little lemon juice as a disinfectant.
How To Clean An Ice Maker: The Condenser
The condenser is located on the back of the machine and is responsible for releasing the heat that’s created when the ice maker is in use.
Over time, this area can become dirty and covered in dust or lint. In order to clean it, you’ll need to unplug the machine and remove the cover. Use a vacuum cleaner to suck up any debris or particles that may be clogging up the unit. You can also try using a small brush if needed. Once it’s all clean, replace the cover and plug in your ice maker.
How To Clean An Ice Maker: The Tubing
The tubing is another section of the machine that needs regular cleaning. The lines will attach to the tray where ice is made and this should be cleaned often as well (especially if you live in a home with children or pets).
You can use vinegar mixed with water, but just make sure it’s only about 50/50 so you don’t damage any parts of your unit. After using either solution, rinse all surfaces off with clean water and allow units to air dry before plugging back into an outlet.
How To Clean An Ice Maker: The Tray
The tray is also known as the “bucket” and requires regular cleaning due to its role in making cubes once they are completely frozen. This part of your ice maker will need to be removed every few months and washed with warm water and a mild detergent. You can also use a vinegar and water mixture if needed. Rinse off all surfaces and allow to air dry before replacing it in the machine.
How To Clean An Ice Maker – Final Thoughts
When you own an appliance that brings joy to your life, it makes sense not only to take care of it but also to keep its functionality at all times. Your ice maker has been such a blessing for many years and if you take the time to clean and maintain it, it will continue to do so.
By following these simple steps, you can keep your ice maker running like new for years to come. Regular cleaning is key to avoiding any build-up or dirt that could eventually cause problems with the function of your appliance.
Now that you know how to clean an ice maker, there’s no excuse not to keep it in top condition.
