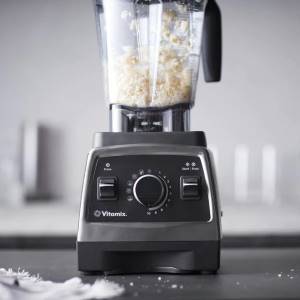
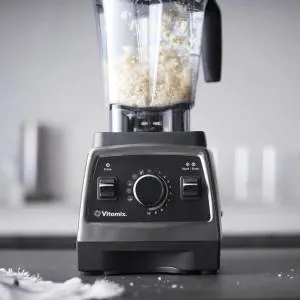
 Can you grate cheese in a Vitamix? Of course you can! There are many ways to grate cheese, but if you have a Vitamix blender the process is fast and easy. You’ll never buy pre-grated or packaged shredded cheeses ever again.
There are some things that you need to know before you grate any type of cheese, such as the best type of cheese for grating, as well as how long it will take to grate your desired amount. We’ll also talk about why hard cheeses like Parmesan work better than softer ones like cheddar, and give tips on how to use a Vitamix with any kind of cheese.
Grating cheese with a Vitamix is fast and easy. In this article, we have some tips and tricks that will help make your job easier when it comes to grating cheese in a Vitamix blender.
Read More: Best Vitamix Blender – Ultimate Guide
Why Should I Grate Cheese in My Vitamix?
There are three main reasons to grate cheese in your Vitamix blender.
The first is that it’s faster than using a box grater. It’s much faster because you don’t have to stop and clean the grater each time. This is nice for when you are in a hurry.
The second reason to grate your own cheese with a Vitamix blender is that it’s more economical. You can buy large blocks of cheese and store them since they won’t go bad right away like pre-shredded cheeses do. This will save you money because you’re not wasting what you don’t use.
The third reason is that it’s better for your health. This may be a little hard to believe, but pre-shredded cheeses have fillers and chemicals added to them in order to stop clumping and sticking together; this can affect the taste of the cheese as well. Grating your own cheese at home allows you to avoid these fillers and chemicals.
Read More: Vitamix Broccoli Cheese Soup Recipe – 2 Easy Ideas
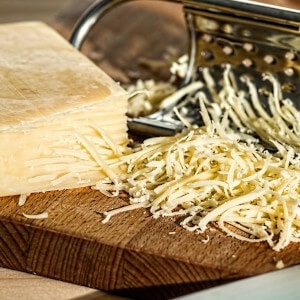
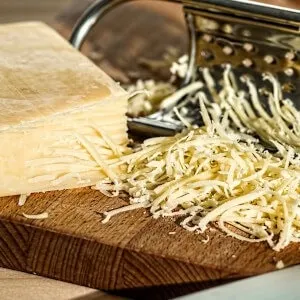
What Kind of Cheese is Best for Grating in a Vitamix?
Generally, harder cheeses like Parmesan work better. They grate more finely than softer cheeses like cheddar. Some soft cheeses can also be used, but they will take longer to process so you’ll want to cut them into smaller pieces first.
Hard cheeses are better when grating in a Vitamix because they produce finer, more consistent results. The longer the cheese is in your blender, the smaller it will become which means you can grate more with one batch.
How Long Does It Take to Grate Cheese in a Vitamix?
The amount of time it takes to grate cheese in your Vitamix will vary depending on the kind you are using.
Harder cheeses like Parmesan take less than a minute to process, while softer varieties can take up to three minutes. This is just an estimate because there are other factors that go into how long it will actually take. If you have larger or smaller chunks of cheese they may require more or less time as well – no two batches will ever be exactly alike.
Is Grating Cheese in My Vitamix Safe?
Yes, grating cheese with your blender is safe but proceed with caution if you are doing this for the first time. You’ll want to make sure not to overfill your container which could cause issues.
If you’re using a Vitamix Ascent Series blender, the Touch Screen will let you know when it’s getting too full so this is less of an issue if you have one of these blenders. If not, make sure to stop before your container gets too close to the max line – or even better would be filling up only halfway.
How Do I Grate Cheese in My Vitamix?
 There are many ways that cheese can be grated but here are some tips for best practices when doing it with your blender:
- Cut larger blocks into thinner slices first; then cross-cut them into smaller pieces until they fit into your container without overflowing which could cause other problems while processing. This ensures that you won’t have too much cheese in your container which can cause issues like overheating. The last thing you want is melted cheese!
- Make sure to use cold or frozen cheeses for best results – room temp ones will take longer and may not work as well. You’ll also want to avoid putting a hot Vitamix container with warm cheese into the refrigerator because it could affect the texture of the grated cheese when using it later, so make sure everything is nice and cool before starting!
- Allow the cheese to settle on top of your blades so that it’s not clumped in one spot. This ensures consistent processing which means you’ll have nice, even shreds without too many large pieces or crumbs.
- If needed, pulse a few times rather than running continuously for best results and less wear and tear on your machine.
- When using harder cheeses like Parmesan, choose smaller containers instead of larger ones; this will allow more air into the container while blending which helps make finer grated cheese because there is less friction from the sides when these types break down better with more space between them during processing.
- Start the blender at the lowest speed possible and then slowly increase to your desired speed. This ensures that the cheese doesn’t fly out of the container during processing – which would be a very messy disaster!
- The higher the blender speed, the finer your cheese will be. This is because more friction from spinning blades helps break down the cheese which results in a smoother mixture and better texture.
Read More: Can A Vitamix Replace A Food Processor? Let’s Find Out!
How to Grate Cheese in a Vitamix Blender – Final Thoughts
If you’ve ever wanted to know how to grate cheese in a Vitamix, then this article is for you. Following these simple steps will ensure that you have perfectly grated cheese every time, whether it’s for a meal or just to top off your favorite pasta dish.
Grating hard cheeses like Parmesan can be done quickly and easily with the help of your blender. Soft cheeses may not work as well but they can be grated in your Vitamix with some extra care.
The tips I have provided will make your job easier when it comes to grating cheese in a Vitamix blender so take some time today to read them over and start grating your own cheese at home! Now that you know how easy this is, what are you waiting for? Go ahead and try out some of the tips in this post today!