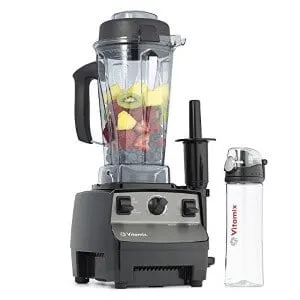
 Vitamix blenders are phenomenal machines. These are premium blenders from one of the best manufacturers in the world.
Anyone who’s serious about blending knows that Vitamix blenders are well-designed, they work amazingly to make smoothies and shakes, and they can be used for food processing and lots of other general applications.
But in order to keep your Vitamix looking great and functioning at peak performance, you must know how to clean your Vitamix blender.
And while with some of the new models, lots of the components are safe to put in the dishwasher, some others are not made to be washed in that way.
This means you need to learn how to clean Vitamix blenders properly. You can do this in several ways, and today we will talk about all of them. We will discuss washing your Vitamix in a dishwasher, washing it in the sink, and allowing it to just wash itself.
The good news is that when you buy a Vitamix blender, you are buying the best. Cleaning is extremely simple, it won’t take you more than a few minutes, and you can do it after every blend to keep your machine in excellent working condition.
Are Vitamix Containers Dishwasher Safe?
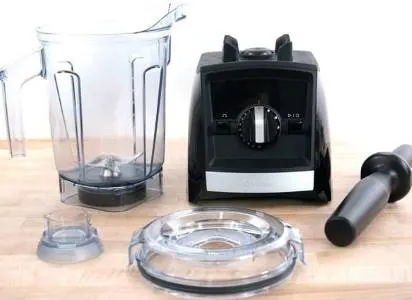 One of the most common questions around cleaning your blender is whether a Vitamix can go in a dishwasher.
To be honest, Vitamix has done a great job in making their blenders easy to clean, and every Vitamix blender has a self-cleaning feature.
You just need to add a drop of dish soap and fill the container with warm water.
Then you set the Vitamix to run on a cleaning cycle, rinse the container after, and you will have a sparkling clean Vitamix container. I go into more detail on the cleaning cycle below.
So, can I put my Vitamix in the dishwasher?
While the above is the best way to clean a Vitamix, it doesn’t really answer the question: can I put a Vitamix in the dishwasher? To answer the question, we should have a look at what Vitamix recommends.
Vitamix recommends that only the S-Series 20-ounce and 40-ounce containers are top-rack dishwasher-safe. All new Ascent and Venturist containers are also dishwasher safe. This means that all other Vitamix containers should not be put in the dishwasher.
I personally know Vitamix users that have put their containers in the dishwasher for years and have never had any problems. That’s not to say that you should, because if you damage your Vitamix parts by washing them in the dishwasher you will most likely void your warranty.
I don’t recommend putting any part of your Vitamix blender in the dishwasher. First off, the heat of the dishwasher and harmful dishwasher detergent may distort or crack your Vitamix container or other parts and may wear them down over time. The bearings on the bottom of the container will rust after prolonged dishwasher use.
Another reason is the length of time a dishwasher cycle lasts. I personally use my Vitamix several times per day, and would rather not wait 60 – 120 minutes until I can use it again. Follow the steps below to clean your Vitamix and you could be back blending in 60 – 120 seconds!
Read More: Can Ninja blenders go in the dishwasher?
Never wash the base in the dishwasher!
This should be obvious but I wanted to mention it. You should never, ever put the base of your Vitamix blender in the dishwasher, or anywhere near water for that matter! The base of your Vitamix is where the motor and all of the electrical components are, and pouring water over them will cause damage, not to mention the dangers of mixing water and electricity.
The base should only be wiped down with a damp cloth, you can see a more detailed guide on cleaning the base of your Vitamix further down this page.
Can I put Vitamix blades in the dishwasher?
All Vitamix blades are made from stainless steel, which is one of the most corrosion-resistant metals you can get. That’s not to say that your blades won’t eventually corrode and rust if you regularly put them in the dishwasher: they will.
Washing any kind of blade in the dishwasher will dull the edges and make them blunt over time. The last thing you want is a high-powered blender with blades that can’t cut through frozen fruit.
Again, it’s not recommended to put your Vitamix blades in the dishwasher. The self-cleaning cycle will clean them just fine and prolong the life of your blades.
Read More: Is the NutriBullet dishwasher safe?
How to clean your Vitamix – everyday maintenance
Your Vitamix blender should get everyday maintenance. You don’t want to use your blender to make a thick smoothie and then leave all the slime and bits of food stuck inside the container. It will harden sooner than you’d probably like, and then you will be stuck scrubbing vigorously by hand.
To avoid unnecessary messes and unnecessary cleaning, always clean your Vitamix blender immediately after use. The first step is to rinse your blender container with warm water, drain into your sink, then fill halfway with warm water, add a few drops of dish soap, and securely attach the lid.
This should always be the first thing you do. Always rinse to get the harder chunks and the majority of slime out, then prepare the blender for self-cleaning.
urn the dial to speed 1 and activate the machine. You can then slowly increase the speed until you hit setting 10. Continue running the blender on the highest setting for a full 60 seconds.
Return the dial to 1 and shut the machine off. This should have cleaned the entire container to perfection. It’s like taking your Vitamix blender through the car wash. Drain the contents of the blender and do another rinse with warm water to get rid of the soap.
With your blender washed, you can air dry it upside down on the counter. While this may be fine for everyone else, you can take it a step further and separate the lid into two parts to wash thoroughly with warm water and soap. You can then rinse and air dry these parts as well.
If you used the tamper during the blending cycle, you also want to wash the tamper with soap and water. Alternatively, the lid and the tamper can also just be put in the dishwasher. But I feel it’s easier to just clean all the parts at once by hand.
Read More: How to clean a Ninja blender
How to Thoroughly Clean Your Vitamix – Deep Clean
The previous steps I mentioned are recommended after each blend. You can always wash the smaller components in the dishwasher, and if you really want you can also wash the main container in the dishwasher too. But allowing it to clean itself just works better.
However, sometimes you need a deep clean. You can do this generally once a month or so depending on how much you use the blender. Just don’t wait too long to clean the blender deeply, or you will find that small particles can be leftover, and you may also find a nasty smell begins to waft out of your blender.
Also, if you made something particularly sticky, the self-cleaning method may not work to get everything out. In any of these cases, you need to do a deep clean. For this, the first step is to fill the entire container with soap and water. But rather than turn on the blender, first let it soak for between one and two hours.
After you have let the blender soak for 2 hours or so, then continue with the everyday cleaning method. This may seem redundant, but allowing the blender to soak for two hours will really do wonders to get all the hidden slime out of your blender.
If you were making something really sticky like peanut butter and you’re afraid that soaking won’t work, use a small silicone spatula to scrape as much of the butter from the inside of the container as possible. You may also want to use a soft bottle brush to clean the container manually.
Always be sure to dump out the contents of the blender before running it through a quick-clean process.
Read More: What is the best Vitamix spatula?
How to clean your Vitamix container
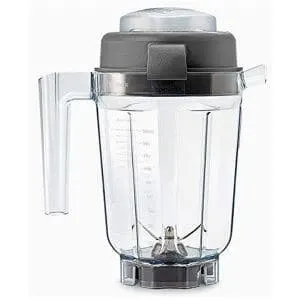 Cleaning the Vitamix container is something you need to do after every use. Not only do you need to clean the blender container after every use, but you need to clean it well! The last thing you want is protein powder and slimy leftovers from your smoothie sticking to the inside of the container.
Most slime will come off immediately just with a bit of rinsing, but if you leave gunk inside your container for too long it will be stuck like cement. This will make it extremely hard to remove, and it will cause a rather nasty odor to begin wafting out of your container. Basically, your container will be full of mold growth.
Read More: Vitamix container compatibility guide
After you have finished the blend, you want to clean your blender before even drinking your smoothie. This won’t take more than a few seconds, and I highly recommend you stick to this process every time.
Start by giving the container a quick rinse with warm water. Don’t use hot water! Give it a good rinse and then put it back on the base. The next step is to squirt a couple of drops of dish soap into the container and then fill it to the halfway point with more warm water. Don’t overfill it or the cleaning process won’t work.
Once you have the lid properly secured and in the locked position, you can select the clean setting on your Vitamix machine. This will clean the entire container for you without your supervision.
However, if your Vitamix machine does not have a clean setting, you will need to begin on variable speed 1, then increase the speed slowly until you hit variable speed 10.
Keep the machine running on variable 10 for about 60 seconds. If you have the automatic clean feature, your blender will shut off automatically without your help. After the cycle has completed, simply pour all the dirty water into the sink and give your blender a final rinse to get rid of all the soap residue.
Now turn your blender upside down and place it on the counter to air dry. I know there are a lot of steps to this, but it actually won’t take you longer than two or three minutes, and it’s worth it to have a clean, well-functioning blender.
Read More: Vitamix Container Loose on the Base? Why You Don’t Need to Worry
Quick-Cleaning Vitamix Container With The Auto-Clean Function
- Add warm water halfway into the container plus a few drops of your mild dishwashing liquid.
- Attach the lid onto the Vitamix container and secure it.
- Turn on the “clean” function and wait for your blender to automatically switch off when it’s clean.
- Safely remove the container from the powerbase.
- Pour out the soapy water from the Vitamix container.
- Use a soft sponge to clean the outside of the Vitamix container and the lid (separated into two parts) with warm soapy water.
- Run clean water onto the container and lid to rinse off the soap and let it air dry.
Deep Cleaning A Vitamix Container
There are plenty of reasons that would make cleaning your Vitamix container more challenging. You will therefore need to do more than the quick-cleaning procedure you are used to.
Here is a list of all the possible challenges I know of;
- Beetroot/turmeric stains
- Onion/garlic stench
- Fogginess on the container walls
- Clogged blades
Eliminating Onion/Garlic Stench
After preparing a vegetable smoothie, your Vitamix container may retain the pungent garlic or onion smell even after rinsing.
To remove the unpleasant odors, follow these steps:
- Fill your Vitamix container halfway with warm water.
- Fill the remaining half with white vinegar.
- Leave the Vitamix container to soak for about an hour.
- Pour out the content and use the quick cleaning procedure described in this article.
Removing Fogginess (Cloudy Vitamix Container)
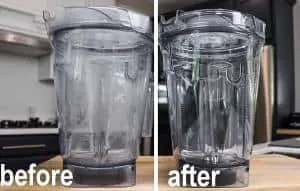 Regular use of your Vitamix causes the buildup of mineral nutrients on the walls of your Vitamix container. You will notice a milky film on the container.
- Add warm water into the Vitamix container halfway full.
- Fill the other half with white vinegar.
- Let it soak for 1-2 hours and pour out the content.
- Using a soft brush, scrub the walls of the Vitamix container and any remaining residue.
- Pour out the content and use the automated quick cleaning procedure.
- Rinse with clean water and leave to air dry.
Removing Beetroot/Turmeric Stains
When used in a smoothie, beetroot and turmeric leave stubborn stains behind their rich color on the walls of your Vitamix container.
Here is what you need to do:
- Fill your Vitamix container halfway with warm water.
- Add 1 tablespoon of liquid bleach into the container.
- Secure the lid onto the container and turn on the cleaning function until it shuts off.
- Pour out the content and rinse with clean water.
- If any stains are remaining, prepare a baking soda paste.
- Pick up your soft brush. Using the paste, brush over the stains while pouring warm water over them.
- Fill your Vitamix container halfway with warm soapy water and quick clean.
- Pour out the content and rinse off with clean water.
- Leave the clean Vitamix container to air dry on the dishrack.
Using Sunlight To Remove Tough Stains
UV rays from sunlight help to break down stubborn stains from beetroot/turmeric. After cleaning your Vitamix container, leave it under direct sunlight for a few hours.
You can then go back and give the Vitamix container another rinse and leave it to air dry.
What’s The Importance Of Cleaning My Vitamix Container After Every Use?
Cleaning your Vitamix container, including wiping the powerbase, helps to lengthen the service life of your blender.
Regular cleaning helps prevent the buildup of residue onto the walls of the Vitamix container and between the blades. This could cause food poisoning due to the growth of microorganisms.
How to Clean The Base Of Your Vitamix Blender
 It is not only the container of the Vitamix that gets dirty. You still need to clean the lid, the accessories, and of course the actual base where the motor is held.
The motor base may not get dirty on a daily basis, since most of your blending is going to be done inside the container. Still, spills can happen, and time makes all things dirty. You don’t need to clean the base every day of the week, but it might be good to have a cleaning process that you can do once a week to make sure your Vitamix stays sparkly.
To clean your Vitamix base, it’s actually pretty simple. Keep in mind that you don’t ever want to put the base of your blender into a dishwasher or into the sink. I shouldn’t have to tell you the damage water can do to your motor and to the electrical components.
Some Vitamix machines have lots of digital components inside the motor base. There is a lot of technology that goes into your pre-program settings, your variable speeds, and your other features. To protect all these technological components, you need to wash your base carefully.
To do this, first, make sure your Vitamix blender is unplugged. Even if you have already removed the blade assembly, you should never work with a machine that is plugged in.
Once you have unplugged the machine, you’re ready to clean the base. The first step is to get a damp rag or cloth. You don’t want it soaking wet, as too much water could seep into the motor and cause irreversible damage. With a damp rag, you can begin by lightly washing the exterior of the base.
Simply wash any grunge or slime off the motor base using your damp cloth. That’s all there really is to it. For cleaning the internals of the motor base, you want to do the same thing. You can even use a pointy bristle brush to get the internal components clean and free of any dust buildup.
After you have given your base a gentle wash, let it dry on the counter or use a towel to quickly dry off the moisture before it can seep inside the machine and get to the internal components.
Read More: Why is my Vitamix Leaking? 3 Reasons & Easy Fixes
How to Clean Under Vitamix Blades
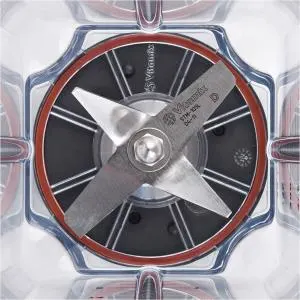 There is a relatively common problem that occurs in many Vitamix blenders. And it’s something your standard cleaning cycle just can’t fix.
This problem is food sticking to the underside of your Vitamix blades. There are a few foods that are worse for sticking to your blades than others. For example, peanut butter, flaxseed, onions, super creamy soups, and stubborn smoothies with thick ingredients.
To avoid food sticking to the bottom of your Vitamix blades, there is not much you can do. And if you don’t take care of the problem immediately, a little bit of food stuck too your blades can cause much worse problems. In fact, this little problem can grow and grow without you even knowing.
Leaving food caked on the bottom of your Vitamix blades can result in your container getting cloudy. You will basically be blending with dirty blades and you won’t even know it. If you have hummus or nut butter stuck to your blades and you try to make a green smoothie, the old food will mix in with the new food!
Before we get started with the cleaning, it’s important that you always clean your Vitamix blender immediately after each use. If you want food to stick to your blades or to any other part of your Vitamix, not washing or rinsing immediately is a good way to go about it.
Read More: How to Sharpen Vitamix Blades – Avoid Dull Blender Blades
The main thing that gets stuck underneath your Vitamix blades is nut butter. Nut butter is notoriously difficult to get off your blades, to scrub off the container walls, and to just generally make go away. Nut butter is super sticky. It’s an awesome ingredient in your smoothies, but it is hard to clean.
One suggestion when it comes to cleaning nut butter is to just not clean it. If you just finished a big batch of nut butter in your Vitamix, try making a smoothie to incorporate all that leftover nut butter slime. Then you can clean your blender after and there will be less butter leftover.
To get leftover slime off your blender blades, you definitely want to clean them by hand. You can always run a cleaning cycle, but using a scrub brush on the underside of your blades before starting the cleaning cycle is recommended. You may want to scrub the blades by hand, run a cleaning cycle, then scrub again.
If the blades have too much food caked on and it’s not coming off with a simple scrub brush, or if your fingers can’t reach the slime, you may want to try a special blade scraper. There are actually blade scrapers made for the Vitamix that you can buy online. These will make it much easier to clean the underside of your blades.
With regular use and proper cleaning, the chances of your Vitamix blades rusting are minimal. But once the rust sets in, you can clean the blades by placing a paste of baking soda and scrubbing with a toothbrush.
Often soaking the rusty blades in vinegar and then scrubbing with steel wool or an abrasive sponge can get rid of the rust.
Read More: How to remove a Vitamix blender blade
Removing Smells And Odors from Your Vitamix Blender
 Sometimes your blender is going to stink. This almost always happens if you have stains for too long, if you go for too long without getting the stuck butter off the bottom of your blades, or if you don’t wash your Vitamix blender properly after each blend. In this case, it’s important to get rid of the smell as quickly as possible.
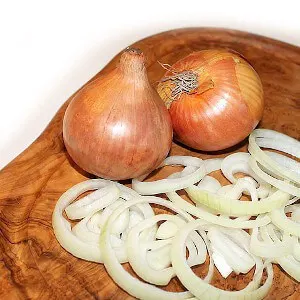
Basically, tiny little food particles get stuck in cracks and crevices and gradually rot, causing a horrible smell. This can also happen if you use a lot of onion or garlic, or other vegetables and foods that have a pungent aroma. And when it comes to making yummy green smoothies, the last thing you want is a blast of onion stench.
So, let’s get rid of those odors! The first thing to do is sponge the inside of your container. There is always some kind of buildup in your container if it stinks. The next step is to fill the blender with a solution of warm water and white vinegar. Then you want to follow the everyday cleaning method allowing the blender to clean itself. Rinse, then do more quick cleaning using dish soap and water. Basically, do it once using vinegar and do it again using dish soap.
Soaking the blender in vinegar should have gotten rid of the smell. If the smell is still there, it’s time to get serious. Soak your blender in a solution of two parts hot water and one part vinegar for about four hours. You may even want to try doing it overnight. Rinse the blender in the morning and then do the self-cleaning method once again with dish soap and warm water.
If both these methods have failed to get rid of the stink, it’s time to add 1.5 teaspoons of liquid bleach to the water instead of vinegar and repeat the self-cleaning process. Then dump the bleach, rinse the container, and repeat the cleaning steps with soap and water.
Read More: What to do if your Vitamix overheats
How to Remove Turmeric Stains from Your Vitamix
Let’s take a look at how to remove turmeric stains. There is nothing grosser than a yellowed Vitamix container. It looks like your Vitamix container has been smoking cigarettes for the last 30 years, and it is not very appealing. Once you get your blades properly cleaned, think about removing the turmeric stains.
There is one special trick that everyone claims is the best. And it’s much simpler than you might think. Simply leave your Vitamix container in direct sunlight for an entire afternoon. This may sound like hocus pocus, but it really does work! The sun shines its UV rays directly onto your container and bleaches the gross yellow stains off.
If you don’t want to get turmeric stains on your container in the first place, keep in mind that hot blends like soups and lattes will stain your blender more than cold blends. Plus, anything rich in fats will work to stain your blender as well.
Read More: Are turmeric shots good for you?
How to Clean Vitamix: Final Thoughts
Vitamix blenders are an essential part of any kitchen, but they do require a little maintenance and cleaning to keep them running smoothly and looking good. Hopefully, the steps above along with the other little tips and tricks, will show you how to clean Vitamix blenders and make it easier for you to enjoy your Vitamix blender for many years to come.
