
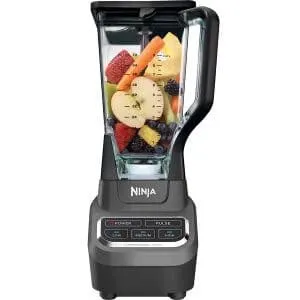
 Ninja Blenders are a powerful and energy-efficient kitchen companion that should, in return, be well maintained.
Cleaning your reliable kitchen companion is a necessary procedure that needs maximum attention.
Are you wondering how to clean a Ninja blender with zero damage? This article is for you; continue reading!
Read More: What is the best Ninja blender?
Cleaning A Ninja Blender
Ninja blenders need proper maintenance and cleaning to increase their service life and efficiency in preparing your favorite blends. Since Ninja blenders handle food, proper cleaning ensures good health for you and your family. I clean my Ninja Blender after every use with extra care.
You have purchased your dream Ninja blender, but the elephant in the room now is, how do I clean my Ninja blender? Read on to find out!
Which Is The Best Way To Clean A Ninja Blender?
There is no best way to clean a Ninja blender per se; all you need is to be extra careful when cleaning your blender.
Keep off using rough equipment or products that may damage it. Use mild detergents and soft sponges when cleaning your Ninja blender.
I have a cleaning routine that I follow every time I use my Ninja blender. I know there are cleaning instructions provided with every blender purchase, but I prefer adding some extra steps.
If you are unsure where to start or what you will need to clean your Ninja blender, you may want to continue reading.
Please note; using a dishwashing machine to clean a Ninja blender is not recommended. Ninja blenders are best cleaned manually for safety and precision.
Read More: Can Ninja blenders go in the dishwasher?
What Equipment & Products Do I Need To Clean My Ninja Blender?
The good news is; everything you need to clean your Ninja blender is within reach. You only need basic household products and equipment that are lying around your house, such as:
- Cleaning sponge
- Mild dish soap
- Lemon
- Vinegar
- Baking soda
Read More: How to sharpen Ninja blender blades
Cleaning A Ninja Blender Step By Step
 Your Ninja blender has two main visible parts; the blender jar and the powerbase. The other small parts, such as the lid, blades, and gasket, also need a thorough cleaning.
Cleaning the Ninja blender jar is the first step when cleaning your blender before cleaning the blades and other parts. The blender jar may contain food residue hence why it needs first priority.
Continue reading for a detailed Ninja blender cleaning procedure;
Step 1: Rinse The Ninja Blender Jar
You will need to fill the Ninja blender jar halfway with warm water, then add a few drops of the mild dishwashing soap into the jar.
Secure the blender’s lid, turn the blender on low-setting, and blend for about 60-90 seconds until a foam is formed. This step helps to remove any leftover food stuck on the jar.
Switch off the blender, pour out the soapy water and rinse the jar with warm water.
Step 2: Remove Tough Stains
Your Ninja blender jar may be stained after blending products with concentrated colors such as beetroot or artificial food color.
Fill the blender halfway with warm water, add some chopped lemon and a few drops of dishwashing liquid to remove the tough stains when cleaning your Ninja blender.
Secure the lid, turn the blender on for 60-90 seconds, pour the mixture out, and rinse the jar off with lukewarm water.
Step 3: Unplug & Disassemble The Ninja Blender For Thorough Cleaning
Unplug the Ninja blender from the power socket.
Disassemble the blender into parts to allow thorough cleaning. Follow the user manual to avoid damaging your blender while disassembling.
Ensure you have easy access to blades and the base of the blender jar.
Step 4: Clean The Blender Jar Using The Cleaning Sponge
Using warm water and your sponge, clean your Ninja blender jar thoroughly, including the base and the edges, to remove any hidden food residue.
Rinse the jar with warm water.
Step 5: Soak The Jar In Warm Water With Vinegar & Baking Soda (Optional Step)
Soak the Ninja blender jar in warm water mixed with baking soda and vinegar for about 30 minutes while you clean the other parts.
This step is optional and helps to remove any stubborn stains and kill microorganisms that may have formed in the blender jar.
Remember to rinse it with clean running water after you have had enough soaking.
Step 6: Clean Other Parts
While your jar is soaking, clean other small parts of your Ninja blender such as the blades, lid, cutting edge, and the gasket with warm water, soap, and the sponge.
You should carefully unscrew the blades for thorough cleaning.
Carefully rinse the parts with clean running water.
Step 7: Allow The Ninja Blender Parts to Air Dry
Carefully place all the blender parts, including the jar, on a dish rank for air-drying until no water droplets are left on either of the parts.
Step 8: Wipe The Powerbase Of The Ninja Blender
Foods and liquids may spill on the base of the Ninja blender. Use a damp kitchen towel soaked in warm soapy water with vinegar to wipe off spills when cleaning your Ninja blender.
Use a damp Q-tip soaked in vinegar to wipe the corners of the activators as food and liquids may spill in them, causing the activators to jam.
Ensure every corner is attended to until sparkling clean. Avoid getting the powerbase into contact with water to prevent unnecessary damage to your blender.
Step 9: Assemble All The Ninja Blender Parts
Carefully assemble the Ninja blender parts using the user manual provided. Store the Ninja blender in a safe space until ready to use again.
Read More: How To Use A Ninja Blender – Ultimate Assembly & Tips Guide
Safety Tips When Cleaning A Ninja Blender
- Ensure the blender is unplugged from the socket when disassembling.
- Avoid exposing the powerbase to water to avoid unnecessary damages.
- Be careful when cleaning the blades to avoid injuring your hands.
- Only use mild dishwashing soap when cleaning your blender.
How to Clean a Ninja Blender – Final Thoughts
Cleaning your Ninja blender is an easy task that you should perform after every use to maintain the effectiveness of your blender.
Thoroughly clean all the corners of your Ninja blender to remove any stuck food that may cause a buildup of germs which may be a health hazard.
Follow the guideline provided in the user manual when disassembling and assembling your Ninja blender during cleaning.
Read More: How to clean a Vitamix blender