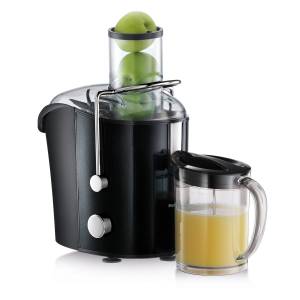
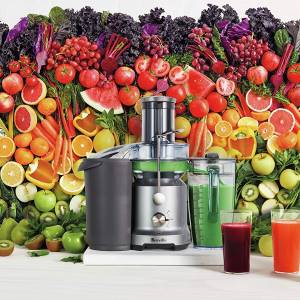
 Breville juicers are a popular choice for many households. The one thing that separates them from other brands is their longevity. They offer high quality and design–but what if they stop working? Even the best appliances break down eventually.
Breville juicers require very little maintenance, so you’ll want to troubleshoot the Breville juicer not working problem before spending time and money on a new one.
If you want to know how to fix these issues without spending too much money on repairs, this post will give you 7 reasons why your Breville juicer might not be working and how to fix them.
Read More: What are the best vegetables to juice?
Stalled Motor
A stalled motor is the most common Breville juicer problem. If your Breville juicer stops working, make sure it’s not because of this issue. The motor needs to reach a certain speed before it can start operating properly and if you are using an old or subpar Breville blender that has seen better days then there may be something wrong with its ability to get up to that speed.
Another cause for why your Breville juicer might have stopped working could be due to lack of power supply – either from within the Breville juicer itself or through an electrical outage in your home which causes all appliances dependent on electricity (including your Breville juicer) not to work as intended/expected.
This usually results in the unit only receiving power for a split second before the Breville juicer shuts down again.
Troubleshooting: If your Breville juicer has been making unusual noises while in operation this could be due to a buildup of trapped air within the Breville juicer system and it is highly recommended that you stop operating it immediately.
This can cause irreparable damage over time, not just from overheating but also if there comes a point where liquid starts being forced into other components then it will result in permanent Breville juicer failure.
Blown Fuse
If your Breville juicer is not working it could be because of a blown fuse. There are two types of fuses with Breville juicers, one for the motor and another main fuse on the machine which will stop all power to Breville accessories if something goes wrong.
The first thing to try when your Breville juicer has stopped working would be trying a new electrical socket. If the plug switch didn’t work, then it’s likely that either there is a problem with your Breville juicer motor or the main fuse has blown which will need replacing.
If this happens don’t panic as the company does provide changeable fuses on their appliances so if one blows, simply pop out the old fuse and insert a new one. This should sort things out but always check before inserting any Breville accessory just in case they are not compatible anymore due to using Breville replacement parts.
It’s worth noting that the Breville juicer’s main fuse is designed to blow if there are any problems with the machine or accessories, so don’t be too concerned when it happens as this was expected!
Breville appliances have a high standard of safety features within them which will stop you from getting injured once they interrupt the power supply to their accessories, but some other juicers won’t do this and can result in accidents.
Read More: How to juice without a juicer
Wrong Assembly
A Breville juicer not working can be due to it being assembled incorrectly. This may cause the motor of your Breville juicer to shut off.
Breville recommends that you read and follow the instructions in its manual when assembling it for use, including making sure that all parts are properly attached before plugging it in.
In addition, Breville recommends that its juicer parts be cleaned often to prevent clogs from forming. If the Breville juicer is assembled incorrectly then it will not run or work properly which can lead to the motor shutting off and even overheating.
This means you need to clean your Breville juicer all the time so it does not overheat during use because of too much gunk getting into the juicer’s main part, where everything gets squeezed together.
Locking Arm Not Engaged
Just like the name suggests, if your locking arm is not engaged and you turn on the machine while it’s in this position there will be no juice extraction. If this happens, unplug the juicer and flip over to unlock and reengage the arm before trying again.
This usually takes one full rotation of turning clockwise or counterclockwise depending on which way locks into place at first glance but may take two rotations after being unlocked due to wear down from use over time.
This is why it’s important to be sure the locking arm has been engaged and locked before turning on your machine.
Read More: How long does fresh orange juice last?
Build Up of Pulp

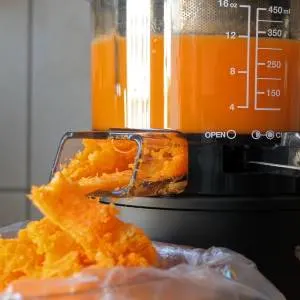 Your Breville juicer will not work properly if there is a build-up of pulp inside the machine. It may seem like everything you put in the chute comes out as juice, but this isn’t always true. There could be a lot of waste and your output won’t improve until you unclog the machine!
This problem usually occurs when people fail to clean their machines after each use or they don’t extract enough fruit from produce before putting them into the chute which results in large amounts of pulp accumulation over time. If that sounds familiar, here are some quick tips so you can get back on track with your daily routine.
Tips to Remove Pulp Build up
Ensure the machine is unplugged. This step should be obvious, but it bears mentioning just in case you’re reading this at work!
Push all of your produce through the chute to see if any pulp or residue remains before using your juicer again. You can also switch out some items like tomatoes and cucumber for harder vegetables like carrots to ensure that there isn’t anything else stuck inside (and start working on eating more veggies instead).
If no pulp comes out try running water into the hole where the juice comes out to force extra pulp back down into the container bin below. Run a few cups of water until everything has been pushed out. You may find you need more than four glasses of water to get rid of the residue.
If you don’t have enough time at this point, just keep rinsing your fruit before putting it in the chute until you do have a chance to clean everything properly!
How to Deep Clean Your Breville Juicer
There are many different methods for cleaning Breville juicers because they all vary depending on their design and components but most require some combination of dish soap, hot water, scrub brushes or toothbrushes (not electric ones), and vinegar.
Soak parts that can be submerged in warm soapy water while being sure not to submerge any electrical elements that may cause problems later if liquid enters them. You should then use a brush with either plastic bristles or one made of natural fiber to scrub down the juicer and remove pulp.
If you need a deeper clean, run warm water with dish soap or vinegar through it until everything is clear of debris before rinsing thoroughly in running tap water.
The process may be different depending on your machine but this should give you an idea of what steps are usually involved when trying to unclog and clean your Breville juicer at home!
Overloading the Juicer
 One mistake that a lot of people tend to make is overloading their juicer. It’s easy to do, especially if you’re new and not familiar with how much produce an average machine can handle at once. Breville juicers aren’t any different in this regard, but they do have an extra feature that will help prevent overload -the automatic shutoff function.
If the auger detects too much resistance as it is rotating (i.e., more than what your juicing recipe calls for), then power automatically shuts off until the user manually resets the motor by turning the unit back on again.
This helps protect your fruit and vegetables from getting excessively mushed up or bruised during processing, which means that the final pulp that is yielded from your produce will be as dry and fresh as possible.
How to Prevent Overloading
To prevent overloading, remember to only feed half of what you normally would into the machine at any given time (i.e., cut everything in half) until you get used to using it and know how much juice it can actually squeeze out with a single load!
You may also want to consider purchasing a second juicer or having an extra one on hand for those times when you need more than just enough juice for yourself – the automatic shutoff function makes cleanup easier because there are no motorized parts inside of the housing unit itself, so anyone can use this without worrying about electrocuting themselves accidentally!
Breville Juicer Not Working – Final Thoughts
In the end, it’s not hard to fix a Breville juicer when you know how to. If your juicer is turning on but won’t extract anything from produce or if it has been working for a while and now doesn’t seem to be extracting juice at all, there are some things that can help.
If you are experiencing any of these problems with your Breville juicer, the above tips explain what you need to do in order to get your Breville juicer up and running again. There are also tips on how to clean your machine so that any of these issues won’t happen again.